- Home
- Features
- More Voice & Text Features
- Contact Labels
- Access Control System
- Advanced Emailing
- Broadcast Reports
- Contact Labels
- Contact Management Software | How To Manage All Your Contacts
- Customer Support
- Do Not Contact List
- Email Your Message
- Embeddable Widgets
- Import Contacts
- Mass Notification Portal
- Mobile App
- Payment Methods
- Recurring Messages
- Send Calls, Texts & Emails
- Share Your Message
- Try Before You Buy
- Home
- Features
- More Voice & Text Features
- Contact Labels
How to Add Multiple Phone Numbers to Your DialMyCalls Contacts
Customers now have the ability to add multiple phone numbers and email addresses to individual contacts using our brand new Contact Labels. We've had several requests for this brand new option and it's officially launched with our latest iteration of DialMyCalls. You can now have a single contact with labels such as: main, mobile, work, secondary, and many more. Managing your contacts and sending voice and SMS broadcasts to multiple numbers from within DialMyCalls has never been easier!
Let’s take a quick look at how you can set up and manage contact labels with DialMyCalls 3.0.
Add Individual Contact(s) and Create New Labels
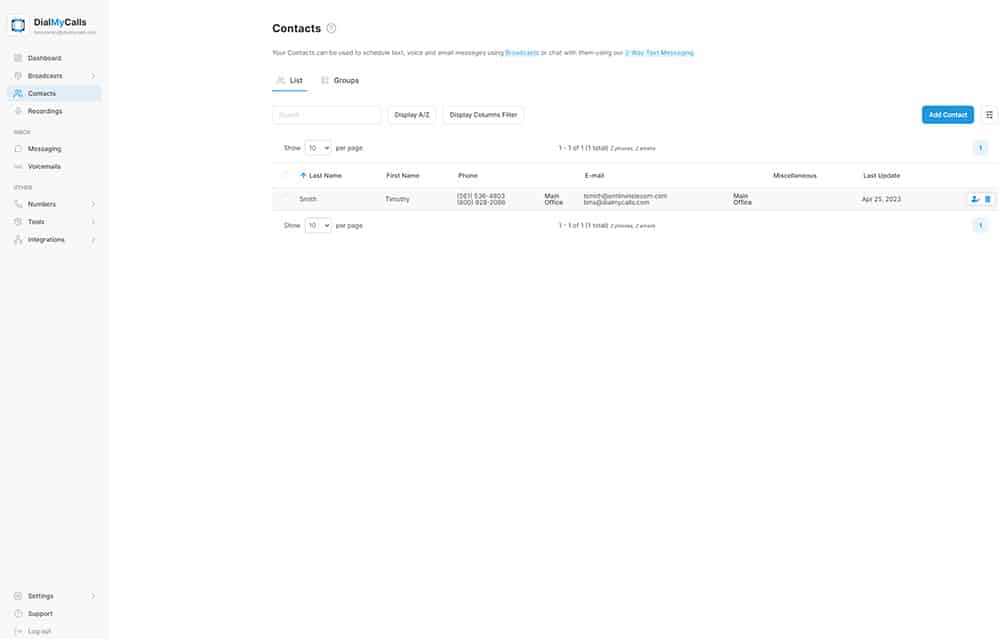
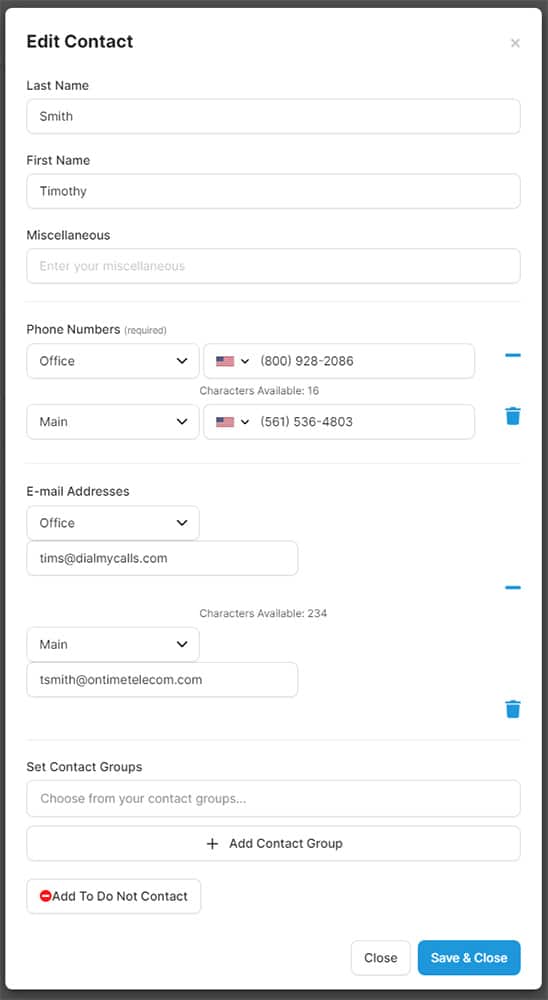
There are a couple ways in which you can create labels in your DialMyCalls account. First and foremost, labels are by request only so you will need to contact us to enable them on your account. Once enabled, the first method to create new contact labels is by adding an individual contact to your account. From the “Contacts” tab, click on the “Manually Add” option to get started.
By default you will already have the label “Main” created which you will see in the dropdown under “Phone Numbers”. While adding your new contact, you will also notice “+Create” is an option and if you click on that then you will be able to create a new contact label.
Create New Labels Before Adding Contacts
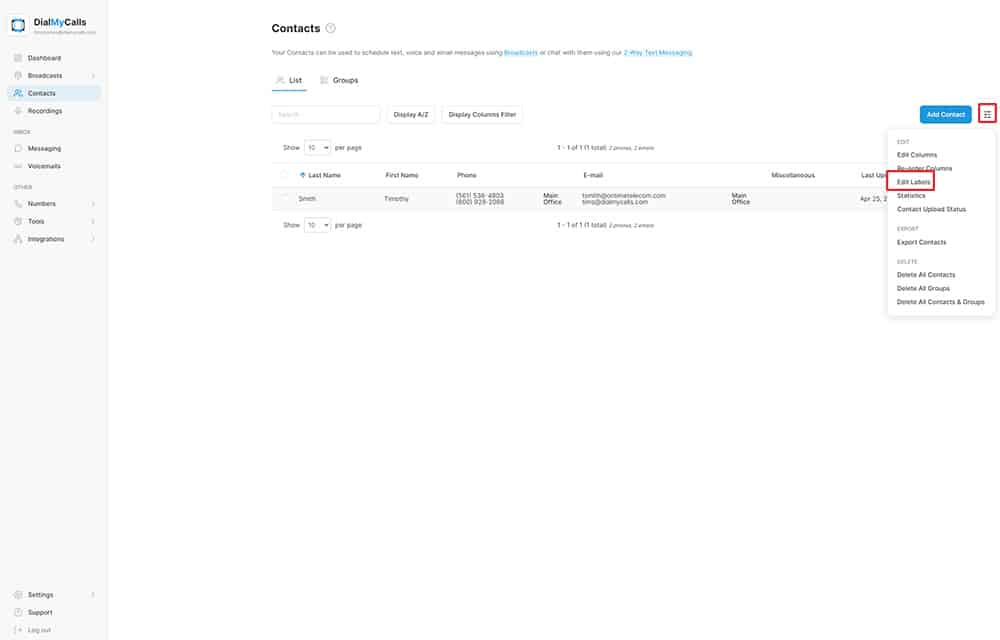
Are you contacting hundreds if not thousands of contacts? If you plan on only uploading contacts into your account and will not be adding them individually then we have a secondary method for creating and managing Contact Labels. Once logged into your account, click on the “Contacts” tab and then “Groups”. From the “Groups” tab you will see an icon under “Add Group” on the right-hand side of your screen – click on that icon to open up our contact management menu.
In the contact management menu click on “Edit Labels” to create a new contact label or edit exiting labels if you have already created them.
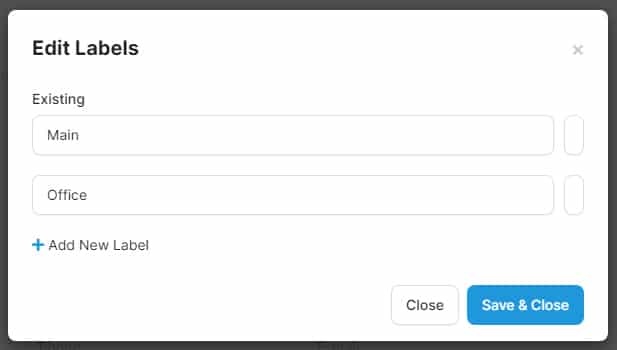
Clicking on “Edit Labels” will show you the existing labels in your account and allow you to add brand new Contact Labels as well- labels are able to be edited and/or deleted once created.
Upload Contacts with Multiple Phone Numbers Using Labels
Uploading a list of contacts into DialMyCalls is quite simple and now customers of our service can take full advantage of our Contact Labels when importing a spreadsheet of contacts. From the “Contacts” tab, click on “Upload List” and then select the spreadsheet (.CSV, .XLS or . XLSX) to upload.
Upon selecting your spreadsheet of contact to upload into DialMyCalls, you will see the “Upload Contacts” preview window. Customers will now assign the data being imported using the dropdown menus above each column. The Contact Labels now allow several columns of numbers and email addresses to be assigned to a single contact – simply click above each column that contains a number and assign it to one of the labels in your account – it’s really that easy! Once you have assigned all of the contact information, you are able to upload the contacts into your account or create contact groups to upload them into.
Set up New Voice / SMS Broadcast and Send to Contact Labels
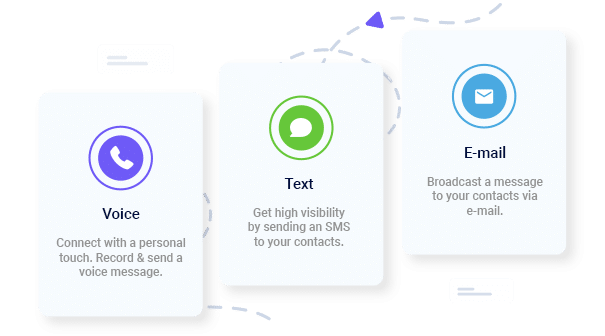
You’ve created Contact Labels and added all your contacts into your DialMyCalls account, what do you do next? It’s now time to set up a broadcast to go out using version 3.0 of our mass notification system. Simply click on “New Broadcast” and then select the type(s) of broadcast you’d like to send to your contacts. Customers have the ability to send a phone call, text message or email broadcast – email broadcasts are only available when sending a voice or text broadcast, you cannot send an email by itself.
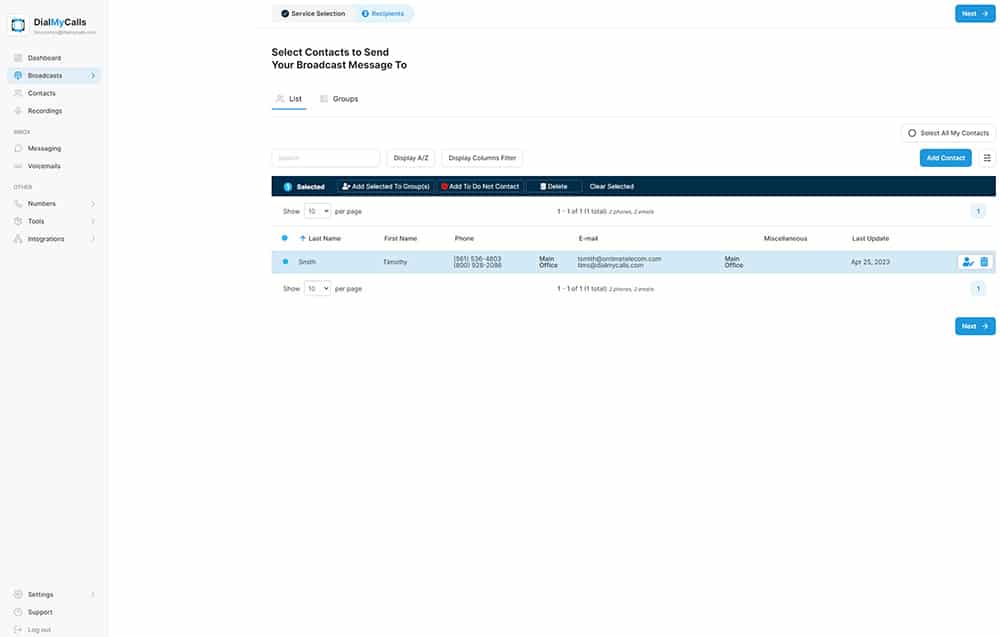
During step 2 of the new broadcast process, please select the contacts that you’d like to send your voice broadcast, SMS broadcast and/or email broadcast out to. You will visually see all of your contacts as well as the Contact Labels associated with them. Once you’ve selected your contact, click on “Next” to proceed to step 3.
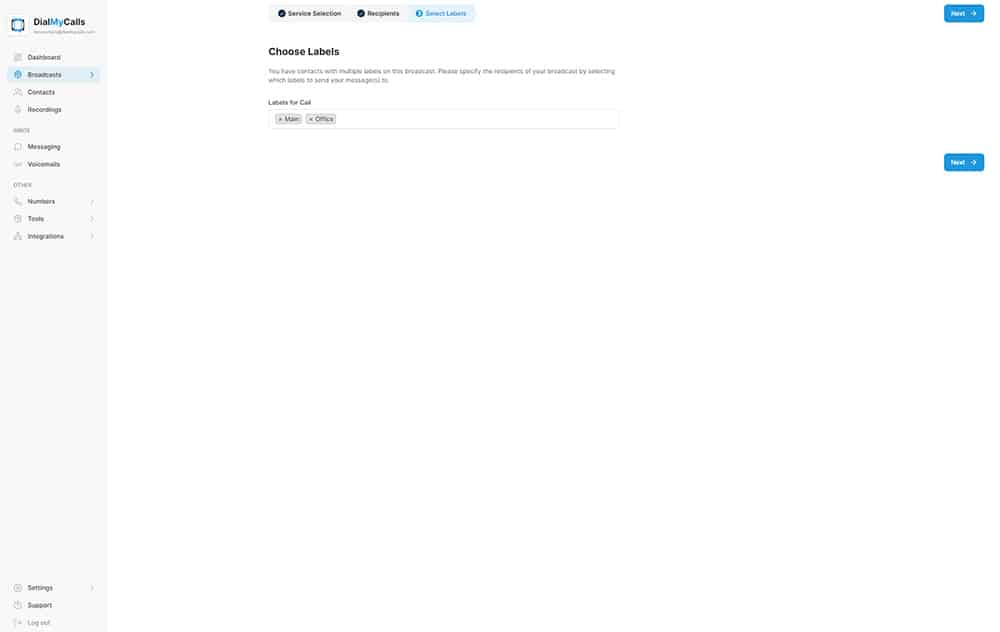
Step 3 of the new broadcast process will have you “Select Labels”. This is where you will select the labels that will receive your phone call, text message and/or email broadcast – multiple labels are able to be selected for each type of broadcast.
Check Status of All Calls/Texts with Detailed Reports
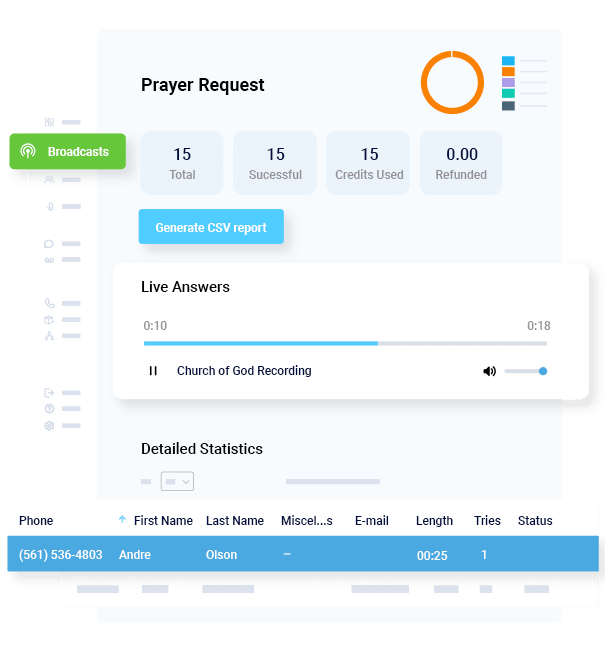
Upon sending out your broadcast to contacts with multiple labels you will be able to check the status of each individual call and/or text that was sent out. From within your DialMyCalls account click on “Reports” and then you will see every broadcast that has been sent from your account once they are completed – click on the broadcast name to view the detailed report.
With the launch of DialMyCalls 3.0, customers now have the ability to add multiple phone numbers and email addresses to a single contact. Our brand new “Contact Labels” system is available by request only – please ask to have it enabled on your new account if you feel you’d benefit from it. If you have any additional questions, please contact us for more information.
